
Tired of your various Mac apps winding up in the wrong virtual desktop? I know the feeling.
Well, good news. You can, in fact, assign an app to a specific desktop in Mission Control—perfect for keeping your programs in their proper “spaces,” particularly when you’re booting up your Mac.
Before we begin, something to keep in mind: this trick applies only to apps running in standard “windowed” mode. Programs running in “full screen” (a handy new feature in Mac OS X “Lion”) automatically get assigned to their own desktops.
Related: Getting the hang of desktop “spaces” in Mission Control


Just select “This Desktop” to pin an app to a specific Mission Control desktop.
So, ready to start “pinning” your apps to specific desktops? Here we go…
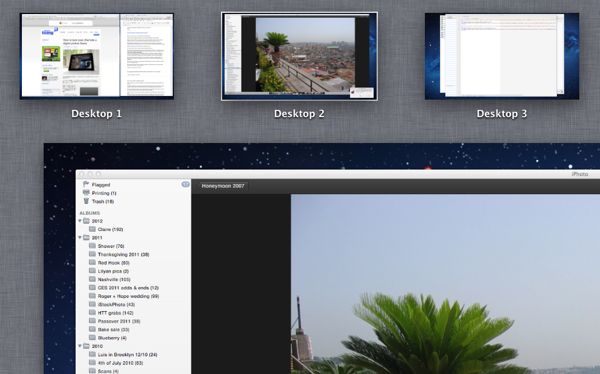
- First, navigate to the desktop where you’d like a particular program to call home. If, for example, you want iPhone to sit in Desktop 2, launch Mission Control, then click on Desktop 2 from the overhead Mission Control view (or create a second desktop if there isn’t one already).
- Launch the app you want to assign to the desktop—again, let’s use iPhoto as our example.
- Go down to the Mac desktop dock at the bottom of the screen, find the icon for iPhoto, and right-click it.
- In the menu that appears, select Options, then select “This Desktop” under the “Assign to” heading.
Now, let’s test. Go ahead and close the app you just assigned to a desktop, navigate to Desktop 1 in Mission Control, then launch the app again—and when you do, it should launch in the desktop you assigned it to.
Also, if the app you’ve pinned to a desktop opens automatically when you start up your Mac, the app will now launch in its assigned window.
Related: How to rearrange your Mission Control desktops
OK, but what if you want to “unpin” an app from a desktop? Just right-click its icon in the dock, select Options, then select “None” under “Assign to.”
Looking for more Mac tips? Click here!