All well and good … unless the actual hard drive on your Mac goes south, taking the Recovery HD disk partition with it.
That’s why anyone who’s installed “Lion” on their Macs should stop what they’re doing and run a new Apple utility that will turn a USB thumb drive into a Recovery HD disk—perfect for administering first aid to a Mac with a glitchy hard drive.
Note: The very latest MacBook Air and Mac Mini systems can run their Recovery utilities over the Internet in case of a hard drive failure. For the rest of us, though, creating a USB Recovery HD drive is pretty much essential.
- Get a USB thumb drive with at least 1 GB of free space and plug it into your Mac.
- Go to Apple’s Lion Recovery Disk Assistant page and download the utility. Double-click the download file, open the disk image labeled “Recovery Disk Assistant” that appears on your desktop, then double-click the Recovery Disk Assistant icon.
- A pop-up window will appear, warning you that “Recovery Disk Assistant” was downloaded from the Internet and asking whether you’re sure you want to open it. Go ahead and click the “Open” button.
- Next, a gigantic software license agreement will appear; you can read over it if you have the time and inclination, or just click the Agree button.
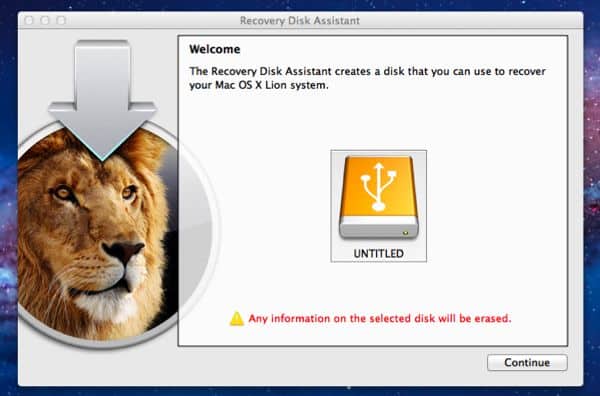
- On the following “Welcome” page, click on the yellow disk icon representing your USB memory stick, then click “Continue”—but not before you double-check that there’s nothing important on the USB drive, which is about to get wiped clean.
- Right after you click “Continue,” you’ll be prompted to enter your Mac user password; this is the password you created when you first set up your Mac.
- The utility will start creating your USB recovery drive—a process that takes several minutes. Coffee break, anyone?
- All done? Then click the “Quit” button, remove your new USB recovery drive, and store it someplace where you won’t forget it.
So, let’s say your Mac’s hard drive conks out and Lion’s built-in Recovery HD utility refuses to work. Now what?
- Plug the USB recovery drive into your ailing Mac, turn it on, and press and hold the “Option” key.
- In a few seconds, a series of hard drive icons will appear in the center of the screen. Click the orange USB Recovery HD drive, then click the arrow just beneath its icon to boot your system.
- Within a few seconds, you’ll arrive at the Recovery HD toolkit, complete with options for diagnosing hard drive problems, importing a Time Machine backup, or reinstalling Lion from scratch.
Have more questions about “Lion”? Check out the Mac OS X Lion Survival Guide for help, how-tos, tips and tricks.


Is there an advantage to this over just making a flash drive with the Lion DMG?
It’s basically a simpler, more streamlined process for those who’d rather not take the do-it-yourself route.
I have a new Macbook Air with an SD card reader. Can I do this with one of my SD cards?
Hi there — sorry, USB drives only.