Change can be hard, I know, and nothing seems to change more often as iOS (especially lately, right?). But hey, you owe it to yourself to make a change for the better—and believe me, you can do better than the “stock” iOS keyboard on your iPhone or iPad.
Read on for four reasons to make the switch, starting with…
1. It’s easy to install a new third-party keyboard app for your iOS device
If you’re worried that switching to a new keyboard app on your iPhone or iPad is a task for an expert—it’s not. Installing a new keyboard on your iOS device is actually easy; believe it or not, the most time-consuming part is waiting for the keyboard app to download from the App Store.
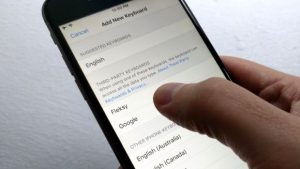
Installing a new iOS keyboard app is as easy as picking a keyboard from the list.
Once you’ve downloaded a third-party keyboard app (my favorites are below), just tap Settings, General, Keyboard, then Keyboards. Next, tap Add New Keyboard, tap the name of your new keyboard under the Third-Party Keyboards heading, and…well, that’s pretty much it.
The next time the iPhone or iPad keyboard appears, you’ll see your newly downloaded keyboard. To switch back and forth between your new keypad and the standard iOS keyboard, tap the key with the little globe. If you like, you can compare third-party keyboard apps by installing multiple keyboards at once; you can then cycle through them using the globe key.
To remove a keyboard from the list, tap Edit at the Keyboards screen, tap the red dot next to the keyboard you want to remove, then tap Delete.
Just tap the little globe key to switch between your installed keyboards.
In case you’re wondering, “deleting” a keyboard only removes it from your list of active keyboards; you’re not really trashing anything unless you actually delete the keyboard app from the iOS home screen. Also, rest assured: it’s impossible to delete the stock iOS keyboard (labeled “English” or whatever your native language is). If you ever want to get a “deleted” keyboard back, tap Add New Keyboard on the Keyboards screen.
2. There are lots of great third-party keyboard apps available
There’s no shortage of worthwhile keyboard apps on the App Store, and best of all, most of them are free. And generally speaking, the only time you’ll need to fork over any cash is if you want an optional extra, like a snazzy new keyboard design.
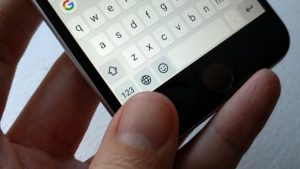
Among the top third-party keyboards: Gboard, a keyboard with Google that boasts built-in web, image and GIF search; Word Flow from Microsoft, which comes with a nifty one-handed typing mode; GO Keyboard, offering dozens of eye-catching keyboard themes; and SwiftKey, which was among the first keyboards to try predicting your next word as you type.
In case you’re wondering, Gboard is my current favorite keyboard app for iOS, but you should try as many alternatives as you can; after all, they’re (mostly) free.
3. You might become a better typist
You can only type so fast when you’re tapping one key at a time, and all that tap-tap-tapping can get pretty tedious over time. If you have an open mind, many third-party keypads have clever tricks up their sleeves that’ll make touchscreen typing both faster and fun.

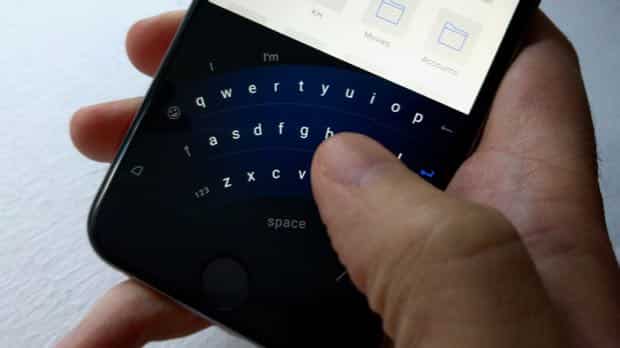
A third-party keyboard named Swype offers a theme with number and symbol shortcuts on the main letter keys.
Keyboards like Gboard, SwiftKey and Word Flow all boast an essential feature commonly known as “gesture” or “glide” typing. In a nutshell, gesture typing lets you type by swiping from one key to another, meaning you only lift your fingertip from the screen between words. Gesture typing takes getting used to, of course, but once you get the hang of it, you’ll be swiping out words faster than you could ever type them.
Other keyboards have their own unique tools that can help make you a better typist. Gboard, for example, lets you move the cursor by swiping back and forth on the spacebar, handy for making precision edits. Word Flow has a one-handed mode that curves the keyboard toward your left or right thumb. Swype, a 99-cent iOS keyboard app, has a theme that puts shortcuts for numbers and common symbols (like “@,” “$” and “&”) in the corner of letter keys; just tap and hold a key to type the number or symbol.
4. You can customize the look and feel of your keyboard
Tired of the bland design of the standard iOS keyboard? Most third-party keyboard apps offer a series of “themes” that’ll change the look of your iPhone or iPad keypad. You’ll usually find a keyboard’s theme settings by launching the keyboard app from your iPhone or iPad home screen.

Some keyboards (like Gboard) let you create your own keyboard themes using pictures from your iOS camera roll.
Some themes are as simple as a light or dark, while others offer different colors or eye-catching designs.
You may even be able to create your own keyboard theme using images from your iOS camera roll. Just keep in mind that some themes will require in-app purchases.
Bonus tip
Many third-party keyboards will ask you to enable a “Allow Full Access” setting during the setup process. What’s that all about?
Basically, the Allow Full Access setting lets the makers of a given keyboard take a peek at your typing, enabling them to learn from your habits and (supposedly) do a better job of predicting what you’re about to type.
Is that a privacy concern? You bet, and you can read my take on the whole issue here. The bottom line is that the best keyboard developers will keep your usage data anonymous, and they’ll also take pains to ignore sensitive data like passwords and credit card numbers.
That said, if you don’t want anyone looking over your shoulder while you type, you can always leave the Allow Full Access setting off, although you’ll potentially have to settle for iffier text predictions.