Never fear, I’ll dive into the basic about Google Docs in a future post. (If you’re feeling the itch to give it a try, just click here to get started—and remember, if you have a Gmail account, you already have a Google Docs account.)
For now, though, I thought I’d let you in on five clever tricks that Google Docs has up its sleeves.
1. Edit documents in full-screen mode
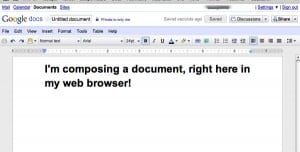
Yes, composing a Word document in your web browser can be an odd feeling at first, particularly with the standard Google site navigation peeking out at the top of the browser page. An easy way to make the whole experience a little more natural is to turn on full-screen mode, which removes all the navigation and document rulers, leaving you with nothing but a roomy canvas for your words.
To activate full-screen mode, click the View menu (in your browser, not your desktop) and select “Full screen”—simple enough, right? To return the standard view, hit the “Esc” key.
Want to simplify your document view without losing the Google Docs menu, controls, and document rulers? Instead of selecting “Full screen” from the View menu, try “Compact controls,” a mode that may make desktop Office users feel ever more at home in Google Docs.
(By the way, if you’re worried about losing all your work if your browser crashes, don’t; Google Docs saves your changes almost instantly after you’ve added them.)
2. Drag photos directly into a document
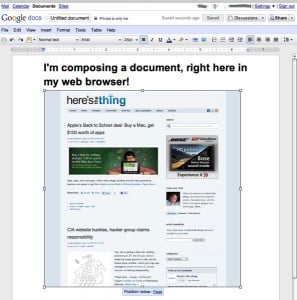
Want to add some images or snapshots to your Google word document? Don’t worry—you won’t have to deal with a tedious Upload page. Instead, just drag an image file directly into your Google doc and drop it wherever you’d like it to go. Once the image is in your document, just grab one of the “handles” along the edges and drag to resize. Neat.
3. Drag a document into a folder
The main Google Docs interface boasts three columns: one that lists your folders (or “collections,” as Google calls them), a second with all your individual Google Doc files, and a third that shows details for any document you select.
Organizing your many Google documents into folders used to be a painful process (well, relatively painful, anyway) of selecting a file and choosing a folder from a pop-up window—and hence, I never bothered with Google Docs folders until recently.
What changed? Well, you can now simply click a document and drag it straight into a collection in the left-hand column. Done (and yes, all my Google documents are now filed neatly away).
4. Share a folder with a friend
One of the beauties of Google Docs is that you can share any given document—or an entire folder—with a friend, colleague, or a group. While sharing a single document is handy, sharing an entire folder is an even more powerful feature. Why? Because once you share a folder, any documents you create or drag into that folder will also be shared automatically. By the same token, any documents you drag out of a folder are instantly un-shared.
To share a folder (or, again, a “collection”), just click on one in the left-hand column in the main Google Docs page, click the little down arrow to the right, and select Share. In the pop-up window that appears, type in the Google IDs or email address of those with which you’d like to share your documents. You’ll also be able to designate whether your collaborators will be able to edit your shared documents or simply view them. (By the way, if you and someone else are editing a Google doc at the same time, you’ll see their real-time edits right there in the browser, and you can even text chat in a pane on the right side of the page. Neat!)
5. Upload an entire folder
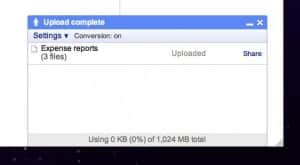
Not only can you upload individual Word, Excel, and PowerPoint files into Google Docs for online editing, you can also upload entire folders at once, which are instantly organized into a “collection” in your Google Docs account.
To give it a try, click the Upload button in the upper-left corner of the main Google Docs screen, then select “Folder” and select the desktop folder you want to upload from the pop-up window that appears. A second pop-up will ask your permission to convert your Office documents to the necessary Google Docs format (don’t worry, you won’t hurt your original files).
Nice, but there’s one catch: You’ll need to be using Google’s free Chrome web browser to upload an entire folder at once. You can download Chrome right here.
All done? Then check out the Collections column on the left side of the main Google Docs page: all your uploaded documents should be sitting right there.
Stay tuned for a full-on Google Docs beginner’s guide in the coming weeks.
In the meantime, have any random Google Docs questions? Let me know.

OK — so I was extremely skeptical about google docs. But I’m starting to get used to the fact that I don’t have to click on Word anymore…. A simple “duh” but it’s a matter of trusting a new way of doing things.
And I think the folders are great.
I have to say — google has turned me from a skeptic to a supporter — not an easy thing to do!