With its uncanny ability to guess your next word before you even type it, SwiftKey makes for an impressive iOS typing app. On Android, though, SwiftKey is even better—much better, actually.
For one thing, SwiftKey’s word-predicting keypad can be used anywhere and everywhere on Android phones and tablets. On iOS devices, SwiftKey is relegated to the single SwiftKey Note app—or at least, that’s how it’ll be until this fall’s iOS 8 update, which will finally allow third-party developers (like those behind SwiftKey) to tinker with the main iOS keyboard.
SwiftKey for Android (you can download it right here) also boasts more ways to learn your particular style of typing, as well as more customization options for the keyboard itself, such as a just-unveiled slate of colorful keypad themes.
Best of all, the Android version of SwiftKey has dumped its old price tag and gone free as a bird (although you will see in-app purchases here and there).
Intrigued? If so, read on for six ways to boost your typing speed with SwiftKey, starting with…
Note: Before you can get started with SwiftKey, you’ll need to pick the SwiftKey keyboard in your Andorid device’s “Language & Input” settings. SwiftKey does a nice job of stepping you through the process as you’re first installing the app.
1. Sync your Google, Gmail, and social network accounts
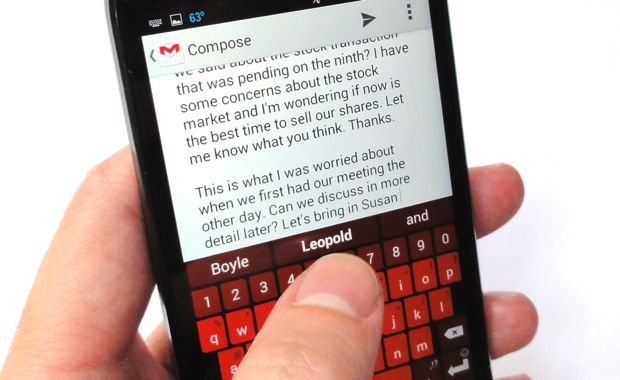
SwiftKey’s signature feature is its ability to predict the next word you’re going to type, with a trio of buttons above the keypad displaying its three best guesses.

SwiftKey will make better typing predictions once it’s connected to your “cloud” accounts.
The makers of SwiftKey say the app’s predictions will get better over time as it learns how you type, but you can also give SwiftKey a head start by (if you’re willing) letting it sift through your Gmail, your Facebook posts, your Twitter feed, and a few other of your online accounts.
Creeped out by the idea of SwiftKey sifting through your Gmail? Understandable—and no, you don’t have to connect any of your “cloud” accounts to SwiftKey if you don’t want to.
The upside, though, is that SwiftKey will stand a much better chance of, say, guessing your wife’s last name once it’s scanned your Gmail message and your social accounts.
Ready to move forward? Just tap and hold the bottom-left key on the SwiftKey keypad (the one with the swirly SwiftKey logo), tap Settings, SwiftKey Cloud, and then Account (to connect SwiftKey to your Google account) and/or Personalization (to let SwiftKey access your Gmail, Google+, Facebook, Twitter, and other social accounts).
Bonus tip: Having second thoughts about SwiftKey poking around your Facebook profile or your Gmail conversations? Just head back into Settings, then tap Delete your Swiftkey Cloud Data and Delete SwiftKey Cloud Account.
2. Undock the keypad
Nope, the SwiftKey keypad doesn’t have to sit at the bottom of the screen—or at least not if you don’t want it to.

Ever wish you could make the keypad on your Android phone float in the middle of the screen? Done.
Tap and hold the SwiftKey key, tap Undock, and voilà—the SwiftKey keypad will be floating in the middle of the screen. Just tap and slide the little handle at the bottom of the keyboard to move it up and down.
You can also tap-hold the SwiftKey key and tap Resize to boost or shrink the size of the keypad, or tap Thumb (to split the keyboard in two) or Compact (to smush the keypad to one side of the screen or the other.
3. Swipe to type
Just like Google Keypad and Swype, SwiftKey will let you type by swiping from one key to another with your fingertip.
The whole swipe-to-type thing (or “Flow,” as SwiftKey calls it) takes some getting used to, but with practice, you’ll probably find yourself tracing graceful loops of words across the keypad.
Swipe-to-type was enabled by default once I installed SwiftKey. If it isn’t working for you, tap and hold the SwiftKey key (the one in the bottom corner of the keypad), tap Settings, Input Methods, then make sure the Flow option is checked.
4. Add a row of number keys
Personally, I hate having to tap an extra key whenever I want to type numbers on my Android phone’s keypad.

Ah, a dedicated row of number keys!
That’s why I love this particular little SwiftKey feature: the ability to add a row of number keys to the top of the standard keypad.
Just tap and hold the SwiftKey button, tap Settings, Layout, then check the box next to the “Number row” option.
5. Add arrow keys to the bottom of the keyboard
Tapping and hold the screen to place the cursor at just the right point in your Gmail message can be a royal pain, particularly for those of us with so-so reflexes.
Well, here’s good news: you can set SwiftKey to add a quartet of arrow keys to the bottom of the keyboard, perfect for moving the cursor with a little tap-tap-tapping.
Adding a row of arrow keys makes it much easier to place the cursor precisely where you want it.
Tap and hold (once again) the SwiftKey key), tap Settings, Layout, then check the box next to “Arrow keys.”
6. Add “emoji” to your sentences
Sometimes, nothing quite says it like a smiley face or a frown—and yes, SwiftKey can try to guess the perfect “emoji” as you’re typing, if you wish.
Tap and hold the SwiftKey button, tap Settings, Advanced, then check the box next to “Emoji prediction.”
Got more questions about SwiftKey? Let me know!